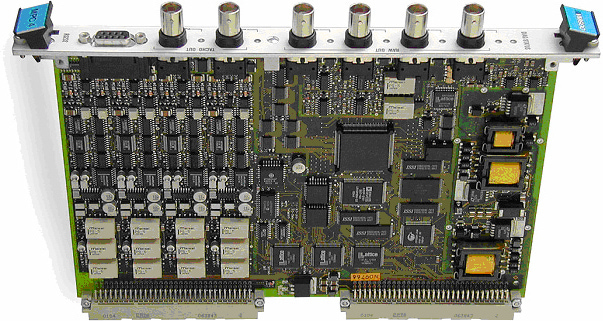
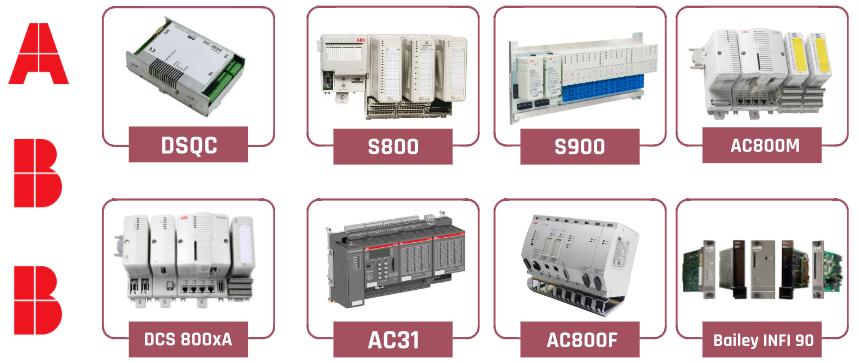
Introducing the ABB DAI05 Digital Analog Input Module Enhance Your Control System

Are you looking for a reliable and versatile digital analog input module that seamlessly integrates into your control system? Look no further than the ABB DAI05 Digital Analog Input (DAI) Module. With its advanced features and robust design, this module is the perfect solution for various industrial applications.

The ABB DAI05 module offers exceptional performance and accuracy in converting analog signals to digital data. Whether you’re monitoring temperature, pressure, flow, or any other analog parameter, this module ensures precise measurements and delivers reliable data to your control system.

Featuring high-speed and high-resolution capabilities, the DAI05 module provides real-time data acquisition, allowing you to make prompt decisions and optimize your processes. With its wide input range and compatibility with different sensors, it effortlessly adapts to diverse industrial environments.

Installation and setup are a breeze with the user-friendly interface of the DAI05 module. Its plug-and-play functionality enables easy integration with your existing control system, minimizing downtime and maximizing productivity. Additionally, the module’s compact design and DIN rail mounting option save valuable space in your control room or cabinet.

Safety and reliability are paramount in industrial settings, and the ABB DAI05 module excels in both areas. Built to withstand harsh operating conditions, it is resistant to vibrations, temperature fluctuations, and electromagnetic interference. This ensures continuous and accurate data acquisition, even in challenging environments.

To further enhance your productivity, the DAI05 module offers seamless compatibility with ABB’s automation platforms and software solutions. This integration allows for easy data management, remote monitoring, and advanced analytics, empowering you to optimize your operations and make well-informed decisions.

In conclusion, the ABB DAI05 Digital Analog Input Module is a dependable and versatile solution for your control system needs. Its exceptional performance, ease of installation, and robust design make it an ideal choice for various industrial applications. Experience reliable and accurate data acquisition, maximize productivity, and improve operational efficiency with the ABB DAI05 module.

Introducing the Mitsubishi MAX -20 C F12 EK 11 MR-J3-200AN 1910680 Servo Driver A Cutting-Edge Innovation

The Mitsubishi MAX -20 C F12 EK 11 MR-J3-200AN 1910680 Servo Driver is a state-of-the-art technology designed to revolutionize industrial automation. Offering exceptional precision and performance, this servo driver is set to redefine the standards in the industry. Let’s delve into the details of this extraordinary product.

What is the MAX -20 C F12 EK 11 MR-J3-200AN 1910680 Servo Driver all about?

The MAX -20 C F12 EK 11 MR-J3-200AN 1910680 Servo Driver is an advanced motion control device developed by Mitsubishi Electric, a leading name in industrial automation solutions. It combines cutting-edge technology, reliable performance, and unrivaled versatility to cater to the dynamic needs of modern industries.

Unleashing the power of precision

Boasting an impressive power range, the MAX -20 C F12 EK 11 MR-J3-200AN 1910680 Servo Driver ensures accurate and smooth motion control. Whether you require high-speed movement or precise positioning, this servo driver delivers exceptional performance with minimal vibration and backlash, making it ideal for a wide range of applications.

Versatility at its finest

The MAX -20 C F12 EK 11 MR-J3-200AN 1910680 Servo Driver offers incredible flexibility, allowing seamless integration into existing systems. With its comprehensive list of communication options and extensive compatibility with industry-standard protocols, this servo driver easily adapts to various automation environments, offering endless possibilities for optimizing production processes.

Enhanced safety features for peace of mind

Safety is paramount in any industrial setting. Understanding this, Mitsubishi has equipped the MAX -20 C F12 EK 11 MR-J3-200AN 1910680 Servo Driver with advanced safety features. From overvoltage and overcurrent protection to thermal shutdown and short circuit protection, this servo driver ensures maximum safety, preventing potential hazards and minimizing downtime.

Unlocking efficiency through intelligent functionality

The MAX -20 C F12 EK 11 MR-J3-200AN 1910680 Servo Driver boasts intelligent features that optimize performance and efficiency. With its advanced algorithms and feedback control, it constantly monitors and adjusts parameters, ensuring optimal power consumption while achieving superior precision.

Conclusion

The Mitsubishi MAX -20 C F12 EK 11 MR-J3-200AN 1910680 Servo Driver is a game-changer in the world of industrial automation. With its cutting-edge technology, versatility, and safety features, this servo driver offers unparalleled performance, enhancing productivity and efficiency in various industries. Embrace the future of motion control with the Mitsubishi MAX -20 C F12 EK 11 MR-J3-200AN 1910680 Servo Driver and witness a new era of precision and automation.

Siemens 6ES7410-5HX08-0AB0 Simatic CPU Module

SIEMENS 6ES7410-5HX08-0AB0

New and Original

with one-year warranty

Fast shipping


Supply: Rockwell-AB ¦ ABB ¦ Triconex ¦ Siemens ¦ ICS Triplex¦ Yaskawa ¦ Pilz ¦ Schneider ¦ Mitsubishi ¦ Honeywell ¦ GE Fanuc ¦ Sick ¦ Bently ¦Beckhoff¦ Omron ¦ Delta ¦ P+F ¦ Foxboro ¦Pilz ¦ B&R ¦Bachmann


Hot selling products

1747-L532 6ES7972-0AA02-0XA0 APOW-01C
1746-NR8 6AV6545-0DA10-0AX0 ASTO-21C
1746-IB16 6ES7972-0BB41-0XA0 ATMB-01C
1746-OB16 6ES7392-1AJ00-0AA0 AOFC-02
1746-NR4 6ES7392-1AM00-0AA0 AINT-14C
1746-NO4I 6ES7153-1AA03-0XB0 AFIN-01C
1769-L35E 6ES7321-1BL00-0AA0 AFPS-11C
1769-IQ16 6ES7323-1BL00-0AA0 3BSE008508R1 DI810
1769-OB16 6ES7322-1HF01-0AA0 3BSE008510R1 DO810
1769-IF8 6ES7323-1BH01-0AA0 3BSE052604R1 AI815
1769-OF4 6ES7334-0CE01-0AA0 3BSE052605R1 AO815

Honeywell FC-RUSIO-3224

  • Product Type : Remote Universal Safe IO device (32 channels, 24 Vdc)

    Operating temperature : Outside module temperature : –40°C ... +70°C (–40°F ... +158°F), Inside module temperature : –40°C ... +90°C (–40°F ... +194°F)

    Storage temperature : –40°C ... +85°C (–40°F ... +185°F)

    Relative humidity : 10 ... 95% (non condensing)


    • Dimensions (L x W x H): 7.24 cm x 16.51 cm x 14.5 cm
      Weight : 0.7 Kg


  • 6ES7392-1AJ00-0AA0 6SL3040-1GA01-1AA0  6ES7212-1HE40-0XB0 
    6SL3040-0PA00-0AA1 6SL3000-0BE36-0AA0  6ES7232-4HB32-0XB0 
    6SL3040-0PA01-0AA0 6SL3000-0CE35-1AA0  CC-PCNT01
    6SL3040-1MA00-0AA0 6SL3055-0AA00-4CA5  3BSE030220R1 
    6ES7313-6CG04-0AB0 6FX8002-1AA01-1AD0  3BSE036456R1 
    6EP1536-3AA00 6ES7223-1BH32-0XB0  3BSE018103R1 
    6SL3054-0EF00-1BA0 6ES7153-2BA02-0XB0  3BSE018135R1 

Unlocking the Power of the ABB BB 3HAC031851-001/05 SMB-unit Revolutionize Your ABB Bailey PLC Experience!

Are you an ABB Bailey PLC enthusiast looking for a game-changing device that takes your programming and automation capabilities to the next level? Look no further than the ABB BB 3HAC031851-001/05 SMB-unit. This unique unit is designed to unleash the full potential of your ABB Bailey PLC system, providing a host of powerful features and incredible benefits that will revolutionize your operations. Let’s delve into what makes this SMB-unit a must-have tool for every ABB Bailey PLC user.

1. Superior Performance and Efficiency

The ABB BB 3HAC031851-001/05 SMB-unit boasts cutting-edge technology that enables unparalleled performance and efficiency. With its advanced processing power and optimized algorithms, this unit can handle complex tasks and large-scale operations with ease. Say goodbye to sluggish response times and hello to lightning-fast execution, ensuring maximum productivity and reduced downtime for your PLC system.

2. Seamless Integration

Integrating the SMB-unit into your existing ABB Bailey PLC system is a breeze. Designed with compatibility in mind, this unit seamlessly connects to your PLC, expanding its capabilities without any hassle. The plug-and-play functionality eliminates the need for extensive reconfigurations or costly modifications, saving you time and money.

3. Enhanced Diagnostics and Troubleshooting

Efficient troubleshooting is crucial for maintaining smooth operations, and the SMB-unit takes it to a whole new level. Equipped with comprehensive diagnostic features, it enables quick identification and resolution of any issues that may arise within your ABB Bailey PLC system. This means minimal disruption and maximum uptime, allowing you to stay on top of your operations without missing a beat.

4. Flexibility and Adaptability

With the ABB BB 3HAC031851-001/05 SMB-unit, flexibility is key. Whether you need to expand your system or implement new functionalities, this unit has got you covered. Its modular design allows for easy customization, ensuring that it perfectly aligns with your unique requirements. Seamlessly adapt your ABB Bailey PLC system as your business grows and evolves, without any limitations holding you back.

5. Future-Proof Technology

Investing in the ABB BB 3HAC031851-001/05 SMB-unit means embracing the future of automation. ABB is renowned for its commitment to innovation, and this unit is no exception. With continuous firmware updates and the ability to integrate with upcoming technologies, you can rest assured that your PLC system will always stay ahead of the curve, keeping you competitive in the ever-evolving industrial landscape.

In conclusion, the ABB BB 3HAC031851-001/05 SMB-unit is a game-changer for ABB Bailey PLC enthusiasts. This powerful and versatile unit revolutionizes your automation experience, offering superior performance, seamless integration, enhanced diagnostics, flexibility, and future-proof capabilities. Embrace the power of the SMB-unit and unlock new levels of productivity, efficiency, and success for your ABB Bailey PLC system. Upgrade to the ABB BB 3HAC031851-001/05 SMB-unit today and experience the difference it can make!

Upgrading Your General Electric DS215SLCCG1AZZ01A with the Latest Firmware

If you’re a proud owner of the General Electric DS215SLCCG1AZZ01A, you’ll be pleased to know that there’s an exciting update available for your device: the latest firmware version. In this article, we’ll explore the benefits of upgrading your DS215SLCCG1AZZ01A firmware and guide you through the installation process.

Firmware acts as the operating system for your device, controlling its functionalities and ensuring optimal performance. With each new firmware release, manufacturers like General Electric introduce enhancements, bug fixes, and new features that can elevate your user experience.

The DS215SLCCG1AZZ01A firmware update promises to bring a range of improvements that can streamline your device’s performance and address any known issues. By upgrading, you can benefit from increased stability, enhanced security measures, and better compatibility with other systems.

To begin the process, you’ll need to locate the latest firmware file specifically designed for the DS215SLCCG1AZZ01A model. Once you have the firmware file, follow these steps to update your device:

  1. Prepare Your Device: Ensure that your DS215SLCCG1AZZ01A is connected to a reliable power source and that all necessary backups of your data are taken.

  2. Access the Firmware: Locate the DS215SLCCG1AZZ01A firmware file that you downloaded earlier. Ensure that it is stored on a USB drive or another portable storage device that can be connected to your device.

  3. Enter Firmware Upgrade Mode: Refer to your DS215SLCCG1AZZ01A user manual to find the specific steps to enter firmware upgrade mode. Generally, this involves accessing the device’s settings menu and selecting the firmware upgrade option.

  4. Connect the USB Drive: Connect the USB drive with the firmware file to a USB port on your DS215SLCCG1AZZ01A. Follow the on-screen instructions to initiate the firmware update process.

  5. Wait for the Update: Allow the firmware update to run its course. Avoid interrupting the process or disconnecting the power supply, as this may result in a failed installation.

  6. Restart Your Device: Once the firmware update is complete, your DS215SLCCG1AZZ01A will restart. Upon reboot, you should now have the latest firmware version installed and ready to use.

Remember, firmware updates are essential for keeping your devices up-to-date and ensuring optimal performance. Regularly checking for updates and applying them when available is crucial for a seamless user experience.

In conclusion, upgrading your General Electric DS215SLCCG1AZZ01A with the latest firmware can bring numerous benefits, including improved stability, enhanced security, and better compatibility. By following the steps outlined in this article, you can easily perform the firmware upgrade and enjoy the added functionalities that come along with it. Stay ahead with technology and keep your DS215SLCCG1AZZ01A up-to-date for an exceptional user experience!

A Beginner's Guide to Using the SIEMENS 6ES7953-8LG11-0AA0 Micro Memory Card - 128KB

Are you new to the world of SIEMENS products and the 6ES7953-8LG11-0AA0 Micro Memory Card? Don’t worry, we’ve got you covered! In this step-by-step guide, we’ll walk you through everything you need to know to get started with this powerful memory card. Whether you’re a beginner or just need a refresher, follow these simple instructions to make the most of your SIEMENS 6ES7953-8LG11-0AA0 Micro Memory Card.

Step 1: Understanding the Basics

Before we dive into using the memory card, it’s important to grasp the fundamentals. The SIEMENS 6ES7953-8LG11-0AA0 Micro Memory Card is a compact storage device with a capacity of 128KB. It is commonly used to store and transfer data in SIEMENS programmable logic controllers (PLCs). Familiarize yourself with the card’s physical features and ensure that it is properly inserted into the compatible slot in your device.

Step 2: Preparing the Memory Card

To use the memory card, it needs to be formatted correctly. Make sure to back up any important data you have on the card before proceeding, as formatting will erase all existing information. Insert the memory card into your device and follow the manufacturer’s instructions for formatting. Once the formatting process is complete, your memory card will be ready for use.

Step 3: Saving Data

Now that your memory card is ready, it’s time to start saving data onto it. If you’re working with a SIEMENS PLC, you can use the programming software to transfer your project files onto the memory card. Connect your device to your computer and open the software. Locate the option to download the project to the memory card, select the appropriate files, and initiate the transfer. Ensure that the transfer is successful before disconnecting the device.

Step 4: Retrieving Data

Need to access the data stored on your memory card? It’s a breeze! Connect your device to your computer and open the programming software. Choose the option to upload files from the memory card and select the desired files to retrieve. Double-check the transfer to confirm that all the necessary data is successfully copied back to your computer.

Step 5: Safely Removing the Memory Card

Before removing the memory card from your device, ensure that all data transfers are complete and the device is powered off. Safely eject the memory card according to your device’s instructions to avoid any data corruption or damage.

And there you have it! With these simple steps, you can now confidently use the SIEMENS 6ES7953-8LG11-0AA0 Micro Memory Card with ease. Remember to always refer to the manufacturer’s documentation and seek assistance if you encounter any issues. Happy exploring!

Mastering the EMERSON CE4006P2 KJ3241X1-BA1 12P2506X062 DeltaV Interface Module A Guide for Emerson DCS Enthusiasts

If you’re an Emerson DeltaV Distributed Control System (DCS) enthusiast, you know the importance of understanding the various modules that make up this powerful system. One such module that plays a crucial role in ensuring seamless communication between devices is the EMERSON CE4006P2 KJ3241X1-BA1 12P2506X062 DeltaV Interface module. In this comprehensive guide, we’ll dive into the tips and tricks to make the most of this module.

1. Familiarize Yourself with the Specifications and Features

Before you start working with the EMERSON CE4006P2 KJ3241X1-BA1 12P2506X062 DeltaV Interface module, it’s essential to understand its technical specifications and features. Review the product documentation provided by Emerson to gain a solid understanding of its capabilities.

2. Ensure Proper Installation

Proper installation of the DeltaV Interface module is crucial for optimal performance. Follow the manufacturer’s guidelines and consult the installation manual to ensure correct wiring and configuration. Pay attention to details such as power supply requirements and grounding techniques to avoid potential issues.

3. Implement Effective Troubleshooting Techniques

When troubleshooting issues related to the DeltaV Interface module, it’s important to follow a structured approach to identify and resolve problems efficiently:

  • Start with the basics: Verify power supply and check for loose connections.

  • Use diagnostic tools: Utilize available diagnostic tools, such as DeltaV Diagnostics, to identify any potential faults or errors.

  • Analyze error codes: Familiarize yourself with the error codes specific to the module and use them as a reference while troubleshooting.

  • Collaborate with support: If you encounter persistent issues, don’t hesitate to reach out to Emerson support for assistance. They can provide valuable insights and guidance.

4. Stay Updated with Firmware and Software Updates

Emerson consistently releases firmware and software updates to enhance the performance and functionality of their modules. Stay informed about the latest updates and take advantage of new features and bug fixes. Regularly check the Emerson website or subscribe to their newsletters to ensure you don’t miss any important updates.

5. Leverage Available Resources

To deepen your understanding of the EMERSON CE4006P2 KJ3241X1-BA1 12P2506X062 DeltaV Interface module, make use of the various resources provided by Emerson:

  • Product documentation: Read the user manuals, installation guides, and technical specifications available on the Emerson website or in their support library.

  • Online forums and communities: Engage with fellow Emerson DCS enthusiasts and experts in online forums to share experiences, ask questions, and gain insights.

  • Training programs: Participate in training programs or webinars offered by Emerson to expand your knowledge and skills related to DCS modules.

By following these tips and tricks, you’ll be able to master the EMERSON CE4006P2 KJ3241X1-BA1 12P2506X062 DeltaV Interface module, ensuring optimal performance and seamless integration within your Emerson DeltaV DCS.

Remember, a thorough understanding of the modules within the DeltaV system empowers you to make the most of this powerful automation solution and enables you to tackle complex industrial challenges with confidence.